Thursday, February 20, 2014

Floors, as written from the airport floor

The sewing room (aka the small bedroom upstairs) is getting closer and closer to done.

My most recent project? Pulling out the carpet!

Normally, I wouldn’t pull the carpets before I finished the construction in the room – which isn't done yet due in large part to contractor scheduling difficulties. Considering it isn't complete yet, you might be wondering why I’d pull up carpets that were also acting as a drop cloth for my wall ministrations…

We got the ducts cleaned!

It didn’t take long at all (maybe 45 minutes) and even though I think it’s a little on the expensive side considering how little time it takes, I’m definitely glad I did it!

Isthmus House wasn’t originally heated as it is now, it had coal, complete with a coal room (don’t worry, you’ll hear more about the coal room later). The ducts were added after the fact and are in funny places like inside an added archway between the living room and dining room and inside the upstairs shower.


See? Sadly, I really wasn't kidding about the vent in the shower.

 It also looks like they might not have been cleaned since they were originally installed.

From the grate we found under the floors in the upstairs hallway, to the one that’s shared between the upstairs kitchen/eventual master bedroom and The Other Roommate’s bedroom/kid’s-room-to-be, the ducts were dirty. We found some old kids building blocks, old construction scraps, a plastic tile of the letter O, and a really cool hologram - any guesses what era it's from?


It reads, "JET PROPELLED MISSILE DESTROYER: This pilotless jet propelled missile has a nuclear warhead and is radar controlled. It can track down and destroy another missile traveling at very high speed."

There was one return almost directly over the furnace that took almost 20 minutes alone to clean. There are only two in the entire house - these returns feed air to the furnace for it to heat and push back out to the rest of the house. The filter the crew used had to be cleaned three times - more than the rest of Isthmus House combined - before the one downstairs return (and only about six feet of ducting) was actually clean.  

Pretty, no? It makes me glad I change the furnace filters regularly.


This all leads up to why the carpet in the sewing room had to go.

Carpet is dirty. It holds dirt and grime and germs and it’s generally pretty gross. Consider that these carpets definitely hadn’t had much cleaning since their installation and that they were old and you can see why I’d want to get rid of them before cleaning out the dust and dirt from the house’s ventilation.

So, before the cleaners came, I got to work ripping up the carpets.

If you remember the sneak peek from our post about the sewing room walls, I had some pretty good reason to think the floors were in pretty good shape upstairs. I didn't think I’d get as lucky as I did with The Other Roommate’s bedroom floors, but it doesn't hurt to hope!

Cutting it with a utility knife because I couldn't find my carpet cutter (my workshop is currently a bit of a disaster), it took a little longer but in a smaller room, that wasn't a big deal.

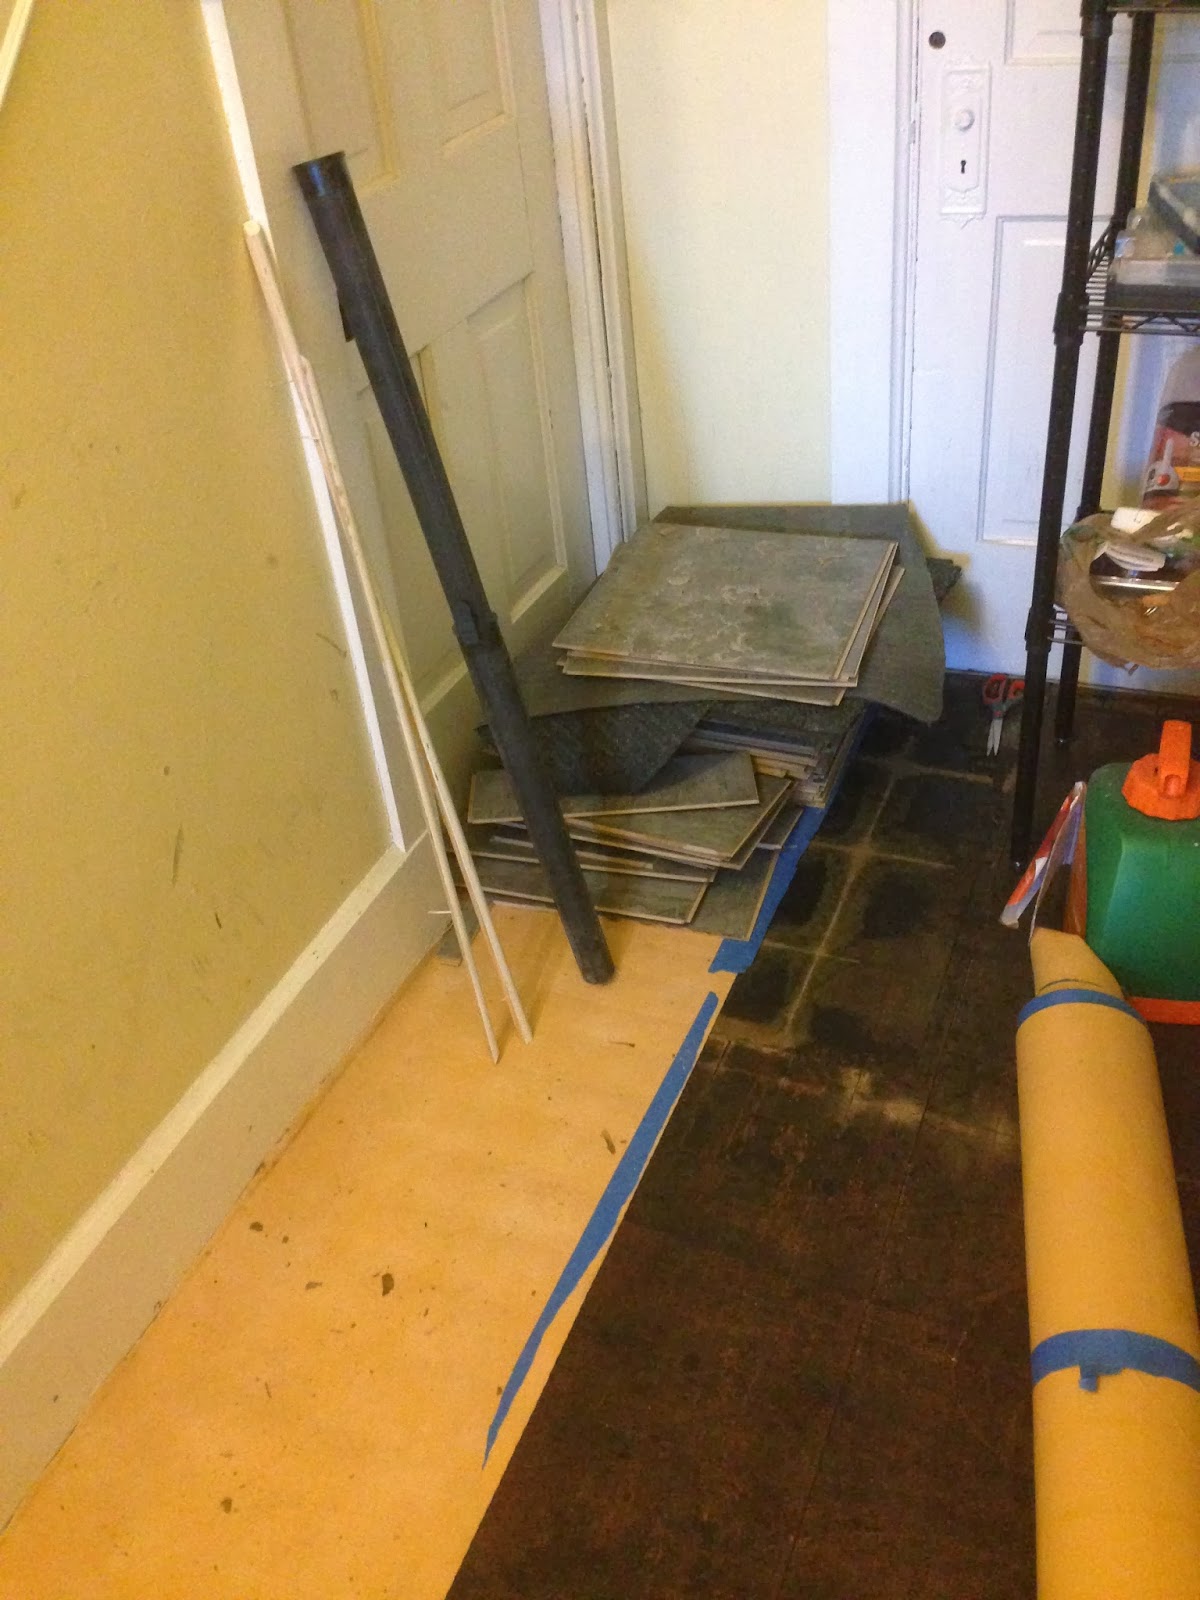
Once it was in strips, I rolled them up and taped them up for easy disposal.  


After getting them pulled up, even I was a little surprised by just how much dirt was under them (that’s all the tan).


Once it was vacuumed up though, the floors look pretty! They’re a little torn up because there was no carpet pad under the carpet to protect them from the carpet binding (the scratchy backing) but they’ll look beautiful once they’re refinished.


The funny thing? The duct cleaners missed one vent – the one in the sewing room – but it’s clean now.

So, for those who want to know what’s coming up next with the sewing room, we’re getting a door! Once that’s done, I’ll be able to finish skim coating the last wall so I can be done with the room and eventually even paint. I guess with the carpet gone I’ll need a new drop cloth… but I think it’s worth it.

*If you're wondering about the name of this post. I'm literally posting as I sit on the floor of the Denver airport. Can't wait to see Isthmus House tonight!


Tuesday, February 11, 2014

Chipping away to get to the character

One of the first things I wanted to do when we moved into Isthmus House was see some brick. It's not like it was hard to figure out where it was and, when we first moved in, I was still considering keeping it as two units for a while longer and brick adds interesting character to old homes. 

When we'd lived there just a few weeks, I got to work one afternoon when The Roommate wasn't home. As always, if you're working with nice floors (I wasn't) protect them from dents and scratches. You should be wearing protective clothing, gloves and safety glasses at a minimum. Earplugs and a mask for dust never hurt either!


It wasn't exactly the prettiest thing when I got started. Using a chisel, pry bar and hammer, I gradually started pulling the plaster off the brick. Chip. Chip, chip. Chip, chip, chip... Plaster doesn't like coming off of brick but it did - just at a glacial pace!


After a while, I'd gotten the middle chunk pretty clean. 


After a few more days, I got started again and got a little further!


So now we have some beautiful character in the upstairs hallway! Would have been exposed originally? Absolutely not, but I think it's lovely and gives a nice point of interest in a formerly boring area!

Thursday, February 6, 2014

Oooooh, pretty!

Old houses have issues but they aren't its fault (I know, I talk about them rather like they're sentient but go with me on this). Old houses also have lots of really great things in them that usually have to be uncovered. I've learned that I’m not fighting the house, I’m fighting for the house to make it a real home. More than anything, I think I’m fighting the people who did all of the crap to kill its homey spirit and trying to prevent it from happening to another one.

As you may recall from our first post about the kitchen here at Isthmus House, it’s a pretty traditional 1910 kitchen. At about 120 sq. ft., it has a door on every wall, a pretty good-sized window, the main stack for the house and some brick that’s covered in plaster jutting into the room.


One of my sorority sisters, Chrissy, is a kitchen designer in metro Detroit and has been helping me figure out exactly how to deal with all of the fun that comes with such a kitchen. Kitchen designers are fantastic resources for kitchen redesigns because they know all of the caveats and considerations. Chrissy is no exception to that rule and came up with a bunch of good ideas for dealing with the odd layout.

While we were discussing and finishing up preliminary plans, I decided that the kitchen was too dark and dreary for me to wait for the full restoration to make some changes. It’s going to be a expensive to do completely and I’m having trouble with opportunity cost (i.e. if I do the kitchen, I can’t do much else around Isthmus House for a bit).

The obvious solution was to repaint the cabinets I already have until I could replace them. A relatively quick project, I got to work this past weekend. With all of my supplies compiled to get the doors down and to get all of the grease and grime off of everything, I got started. Taking off the doors wasn't too challenging even with the hardware painted over. With the first one off, I realized that there might be something interesting underneath.


Underneath all of the grimy paint was what looked a whole lot like decent wood grain. After texting a few pictures around and thinking about it, I took one of the door upstairs to my workshop (aka the former upstairs unit’s kitchen) and got started on stripping the paint off the back so I could get a better idea of what was really underneath the 29340823* layers of paint.

There’s one really important PSA when working with paint stripper: read the directions. You need to wear protective clothing, chemical-resistant gloves and glasses at the very least and sometimes a special mask too. I was using stripper that’s specifically made to be used indoors but stripper contains some really heavy-duty chemicals you don’t want to play with.


After working on the back of the door for a few layers, it occurred to me that the doors might just be replacements and the cabinets (dare I think it?) original.

I came to the conclusion that I couldn't just add another layer of paint to the cabinetry; I needed to know what was underneath all of the layers.

So downstairs I went to start brushing paint stripper on my cabinets.

One layer down, the wood was indeed as pretty as I had hoped.


The end panels, it turned out, have been lots of colors over the past many years including whatever the color is called that they were when I moved in – I’ll go with taupe, a biscuit-y yellow color, bright orange, and white.


Really, they remind me a little of the paper we pulled out of the cabinets when we first moved in. We took a lot of paint off:


Once I got down to pretty clean wood, I sanded them down lightly (fine grit sandpaper, friends – soft woods are easy to gouge!). 


What I found is pretty astounding.


The cabinets are nice quality wood although I’m not sure what kind – maybe multiple kinds. Guesses are welcome!

What I’d like to do eventually is move these cabinets over to the other side of the door out to the foyer. The range is in front of it still (you can see it in the very top picture above), but it won’t be forever! 

This particularly happy find might save me a few thousand dollars (custom cabinetry is a schwee bit expensive but often, as it is in my case, less expensive than stock). Let’s hope it’s the start of a beautiful kitchen!

*numbers are approximate


Thursday, January 30, 2014

Did you just get bored and quit?

There are few things I enjoy more than pristine wood floors. Tile is cold (but at least has its place), carpet is dirty, vinyl is, well, vinyl.

When you’re working on a restoration as I am, “pristine” isn't generally what you’re working with. Sometimes, it’s bad enough that you have to figure whatever is beneath has to be better than what you’re looking at.

That was our situation in Isthmus House’s foyer. Not only were the floors hideous, they were (I think) plastic and therefore more than a little slippery. When The Roommate and I moved in, some of the carpet remnants from the stairs were being used as doormats. We couldn't change that because we’d wipe out walking in the front door when there was rain or snow without them.


That color in the picture might look like grey but I assure you – it’s a mottled blue.

So, shortly after walking in from the gym and almost wiping out because it’s Wisconsin and there was snow on the ground that I tracked in, I decided the plastic floors (that I didn’t know were plastic yet, just that they were ugly and slippery) had to go.

During my earlier tale of stripping carpet from the stairs, you may recall my mentioning metal stripping that “protected” each corner. This was the first thing that had to go on the stair up from the basement to the foyer along with all of the quarter round molding. Naturally, after pulling nails from each stair, I assumed that that’s how this strip was held on too – and I was wrong. Four bent screws later, I was happily on my way to pulling up a floor.


You may recall me mentioning that there was a contractor in the house for a few weeks “fixing things up” before I bought it. I think of this as hiding, but that’s just me.

Upstairs, I thought the floor he put down was the easiest thing in the world to remove (just the top layer, mind you!). But again, I was wrong – because this floor was the easiest! Another floating floor, they just have a tongue and groove and click together. There’s no adhesive or anything else, just a pad underneath.  I feel fairly certain that whatever was on the best clearance is what made it into my house – but at least it’s easy to remove!

No pry bar needed, no scraper (for the top layer, anyway), no nothin’ – this is how it looked within 20 minutes of starting the actual floor removal. The hardest part was taking the “tiles” to the basement!


After the tiles were gone, up came the padding and I found that the floors were almost clean! Well, aside from the old tar paper residue but most of the actual paper was up! We decided that the fixer must have gotten bored and quit pulling it up.


With the floor up, I got to work scraping the left over stickiness up. Granted, a drum sander could have pulled it up nice and fast (and with a lot less actual work), but I can’t finish the floors until I finish the upstairs or I run the risk of ruining them when they’re freshly refinished (notgonnahappen).


Even though I can’t finish them yet, I couldn’t quite help myself… I needed to know how they’d look once they were stripped! The corner by the door to the kitchen (it’s the door in the top photo above – and will be opened when we finish the kitchen!) was a perfect place to check – they’re going to be beautiful!


I think it already looks better – and there won’t be any more wipe outs from slipping on it!


What do y’all think? For better or for worse?

Thursday, January 23, 2014

If it's cracked, I shall fix it

Well, this title isn't exactly all-consuming, I suppose. Sometimes little cracks are nice - they give character. But on my walls, I'd prefer to repair as many cracks in the plaster as possible.

Interestingly, Isthmus House is a mishmash of drywall (made to resemble plaster) and real plaster in various places. I can wax philosophical for you another time on how much I love plaster (yay insulation, sound barriers and durability!) but today is about repair.

Specifically, when I first brought in a plaster repair company to look at saving the plaster throughout Isthmus House, they quoted me $1000-$1200 for this 9ish by 9ish room (maybe a little more). $12-$15 per square foot for what looked like okay shape to me seemed a little silly.

By far the worst area in the room - the corner that wasn't. Formerly covered by scrap wood.

The texture in the white area was on all of the walls when we started.

So, instead, I got to work on it. It took me about how long the pros said it would take them and may not be perfect but my costs were contained in my time and materials. And maybe laundry, but we'll get there in a little bit.

The first step was to get everything I needed. This wasn't my first time working on walls at Isthmus House so I already had most of the supplies I would need but I knew I would need a LOT more joint compound (aka spackle) than I had on hand.

So, I took a trip to Home Depot and bought a nice big bucket of the kind the plaster experts thought was best:
62 pounds! Totally makes the gym time worth it when you don't have to ask for help!
For plaster cracks to really disappear is super challenging - they'll come back eventually since they're just covered up. Digging out the cracks and mudding and taping them (like in an earlier post where my dad helped me with the seams in drywall) can help delay that process.

The first wall I started on was the easiest. With just one door and no windows, it was a lot of smoothing out minor chips, cracks and texture.


The grey in the photo is wet spackle and, as you can see, I'm using the soon-to-be-pulled-out carpet as my drop cloth. More on that in a later post!

The thing with working on walls is that it takes a long time to
1. Prep walls
2. Plaster
3. Wait for dry time
4. Sand them down to make them smooth 
5. Repeat until they're perfect
6. Clean them so they're dust free
7. Prime them for paint (or use paint and primer in one)
8. Paint! (this'll happen later, once the door from the hallway is added)

The other walls weren't too bad either, although more time consuming with the addition of corners, windows and a closet.

One chuck of plaster that was coming off the wall that I took out for repair
A work in progress on that corner - the scrap wood that was covering it is in the lower right hand corner of this picture

If you look closely just over the outlet, you can see where one particularly large crack was taped up

I think The Roommate enjoyed teasing me about what a mess I always was after working on them. Safety glasses, a quality dust mask and play clothes were important on this project!
This shirt is magenta when it's not covered in plaster dust!
It took a lot of "repeats" of the steps above but here's what we ended up with:


Formerly the corner that didn't exist - this is the same hole removed above!
It's funny how the walls can seem okay when you get started and how noticeable the improvements are when you're done. These walls are beautiful now and will make for a great bedroom or office when Isthmus House is done. We still have to put in a door to the hallway (didn't finish up that wall just to have a hole cut into it), add molding and pull up the carpets but it's well on its way...

Here's a little snippet of what's to come - get excited!


Thursday, January 16, 2014

It's supposed to be welcoming, dang it!

It's not easy to coordinate lots of moving pieces, projects and people when I'm halfway across the country more often than not (only a slight exaggeration) but rarely are the things worth doing easy. 

This past week, my first flight out of Madison got cancelled because it was -20 degrees with a -50 windchill. Some people chose to use the extra time for boiling-water-flinging off of balconies that I'm sure you could YouTube but I chose to stay cozily wrapped up in Isthmus House thinking about my kitchen as y'all read about last week.

This week, it hit nearly 40 degrees on the thermometer before dipping back below freezing. Naturally, that means ice everywhere. Our driveway and sidewalk managed to produce inch-thick ice with no additional snowfall so The Roommate and I spent part of Sunday chipping away at it with shovels and an ice-breaker and getting concrete-safe salt down. 

Sadly, needing to take care of those things (and looking worriedly at my roof whilst praying for no ice dams) made it challenging for me to reveal that which I hoped to reveal this week. So, dear readers, you'll be waiting one more week. 

That said, it's not like we only have one project going at Isthmus House at a given time - that would be far too mundane for my mild, project-centered ADD. No, after finishing up another step on next week's reveal, I wanted to start something else. Walking down the stairs to get a glass of water provided my source of inspiration - the stairs!

Up until now, I didn't really know what was under the carpet and metal strips that had been unceremoniously nailed to every tread.


 Although my prayers leaned toward clean hardwood, I figured it was either:

a) something tacky (meaning sticky, not gaudy - the latter is assumed with before photos at Isthmus House)
b) something that was slopped on the there (I was guessing lots of layers of stain, paint or both)
c) something slippery (because then I couldn't take off all of the carpet and metal)
d) all of the above (they could have found a way, I'm sure)

I started on the top stair and worked by way down. The top stair did, indeed, have some tacky tar-paper like coating. I wasn't planning on pulling out my scraper this weekend so I left that one intact lest we stick to it only to pitch forward into the window only four stairs away on the landing. (Does it sound like I try to prepare for the worst case scenario?)


Nevertheless, with the house to myself, it was the perfect opportunity to clean up the stairway (prybars and hammers are loud - use ear protection and you can still hear your music!). I decided to keep going and pried up the next stair's metal and carpet. With five nails to every tread, my first thought was that the patching these stairs are going to need isn't going to be a cakewalk.

This stair was not tacky, just dirty as could be. And it did have the build up of paint I figured would probably be present. I'm 95% sure that brown is actually paint, not stained wood. I don't see the paint as a bad thing at this point - I'm going to probably do a little damage to the stairs as we continue the projects upstairs and the paint can act as a buffer for me until they're refinished.


It only took me about an hour to get all of the metal and carpet up and to corral all of the nails holding them down. I love getting decent quality nails (or pretty much anything else) out of the things I'm ripping out of Isthmus House (never original things!) - they can be reused and I don't have to buy more!

Like I said, the stairs were more than a little dirty...


But they looked so much better after washing them with just warm, soapy water.


When The Roommate came home, she commented how much better they already looked without the carpet and metal and I think I have to agree. We still have a long way to go in this foyer and the stairway but there should be a beautiful entryway when we're done - that's progress!


Friday, January 10, 2014

Can't I just rip down the wall?

Timelines around restorations are next to impossible to stick to when you're traveling half the time and trying to coordinate contractors the other half. I don't plan on letting anyone cut holes in my walls if I'm not there.

I would love to just rip out one set of cabinets, cut a hole in my wall and slide in the fridge where it belongs but that's not a real possibility yet. One thing I've found can help me stick closer to schedule is planning to the the smallest details. I'm working on kitchen plans, den plans and upstairs plans. This week, let's talk about kitchen plans.

Without a doubt, I'll be keeping my beautiful, only-slightly-sloped Douglas fir floors. They have only mild water damage in a couple of small places so I might have to feather in some of the pieces I got other places in the house but it won't be too bad.

Currently, I'm thinking white, shaker style cabinets like these. I keep looking for salvaged cabinets I can use but it's challenging when you have 9-foot ceilings and going all the way up would look best for the house! When I'm thinking these things through, I'm trying to decide how many open shelves I can use by the sink - we'll talk sinks in a minute - and can I use glass doors?

Other considerations include butcher block (in more of a deep walnut finish) versus black soapstone for my countertops. You'd best believe granite will not be making an appearance in my kitchen. 

Along those same lines, I was thinking about putting in a copper farmhouse sink. Aside from being pretty pricy, the biggest problem with this is that I can't just pick whatever hardware I want. I have to look at the tones of the cabinetry, floor, countertops, hardware and everything else with it. I might go with a porcelain, white farmhouse sink instead since I still love the style.

I've already started compiling lighting - I'm pretty excited for that! It'll be nice to not have only my fridge where it belongs but also to have lights that aren't fluorescent.

Here's the before: think we can improve upon it?